

How to Create a Custom CSS Class and a Custom Title Link via RevoComposer
Have you known that you can create a custom css class and a custom link via RevoComposer’s element? It’s really simple how to style an element and link a title for your own needs. You can add a custom class for the whole element and custom link for the the title.
We are going to show you how easy it is 🙂 So, we are going to create a blog element via RevoComposer and want going to to show you a result of a little bit restyled blog element then a default one. So, here we go guys 🙂
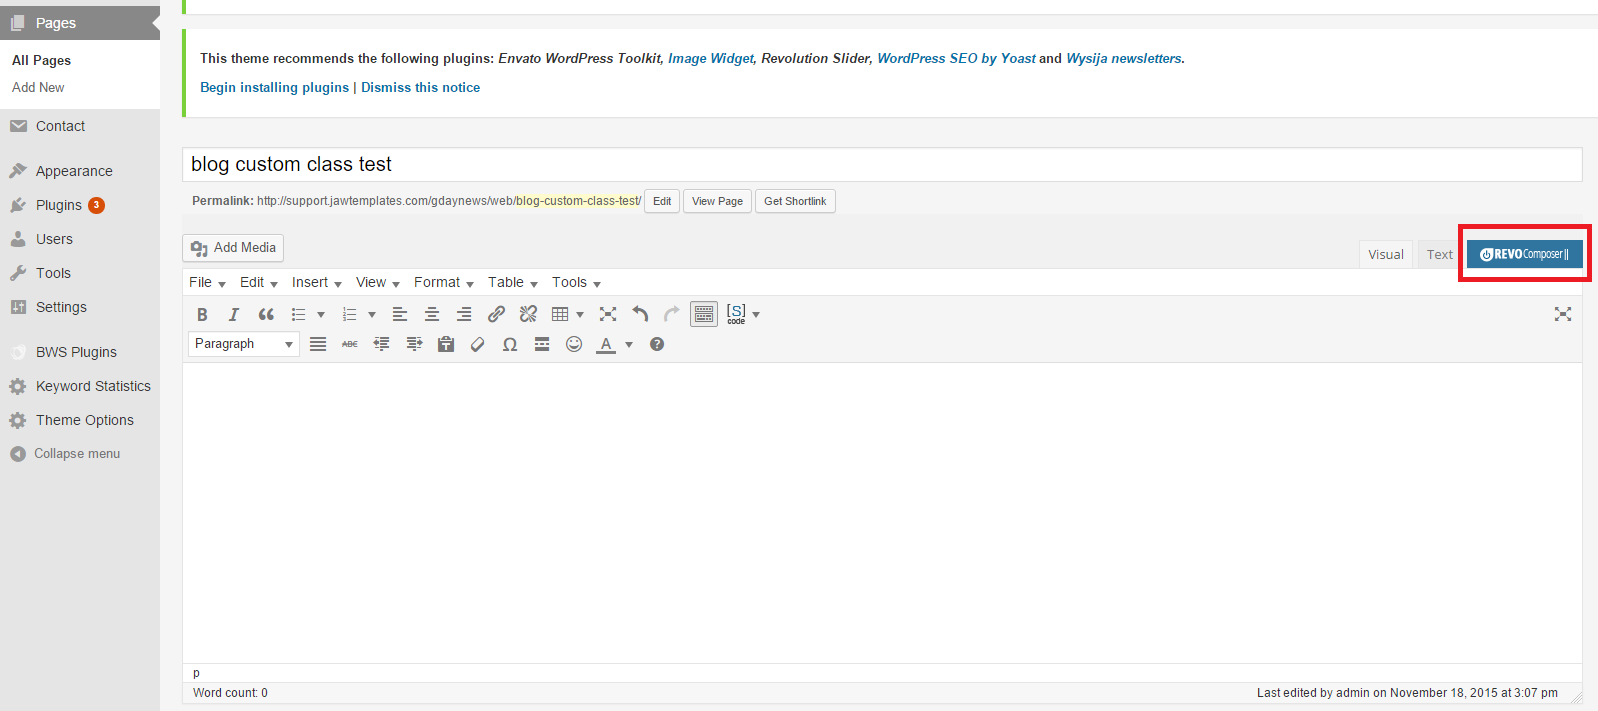
Please go to admin dashboard and create a new page, we named it “blog custom class test. Then click on RevoComposer tab.
Now we want to create a blog. All we need is to click on that Blog element and say that we want to name it something like “Cool Blog”. Simply click on that text and rename it to whatever you want to 🙂
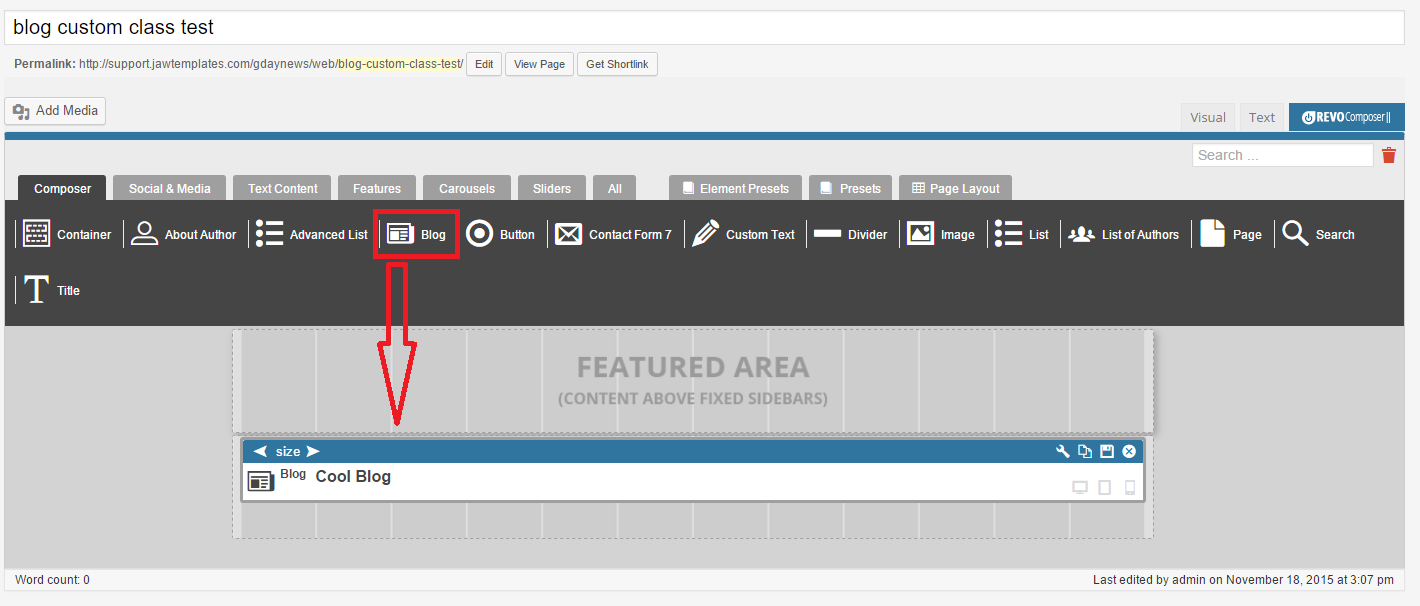
Congratz, we successfully create a Blog element called Cool blog. Now we have to edit this Blog element and add some custom classes for its whole element and its title. Simply click on the wrench icon to edit this element.
![]()
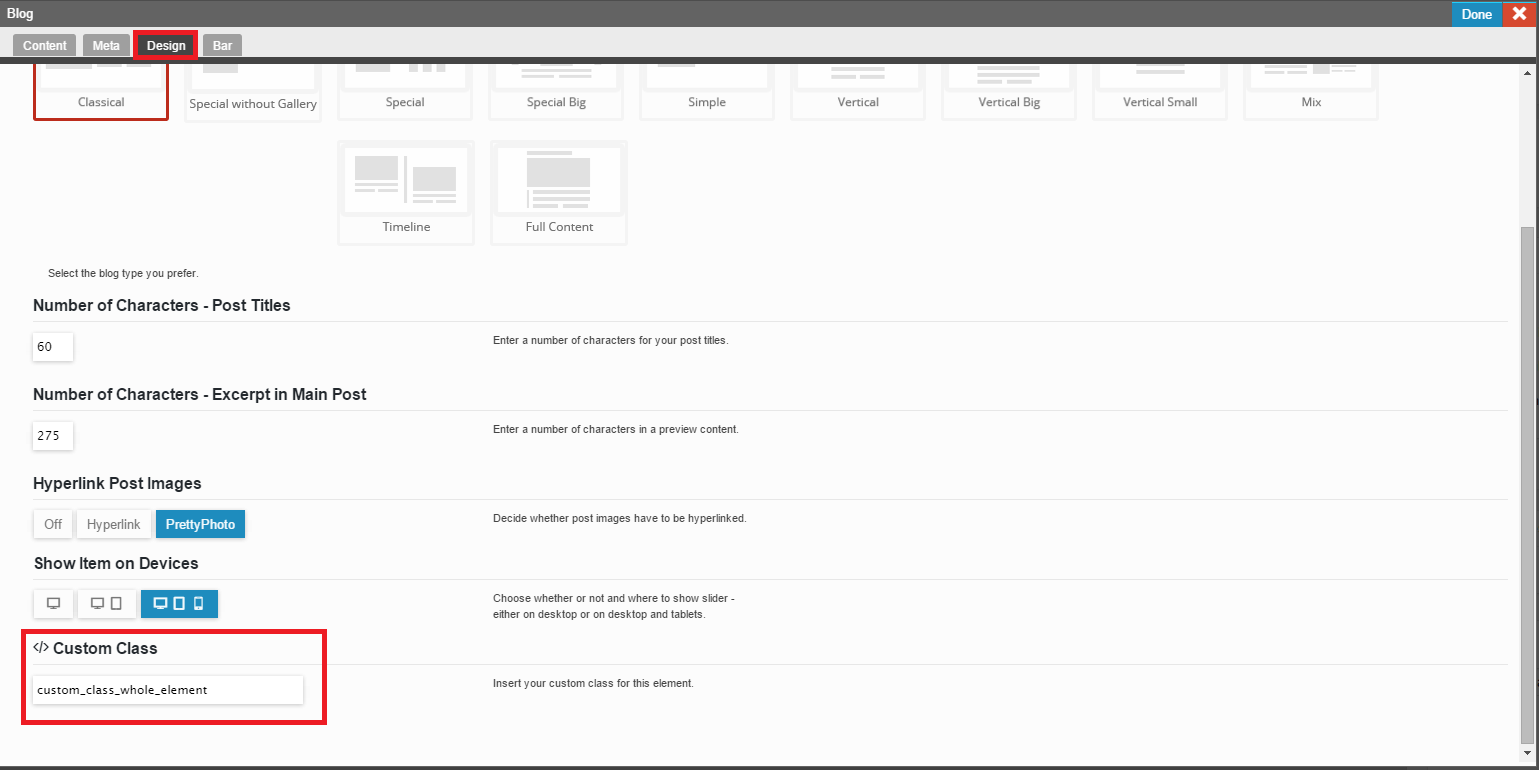
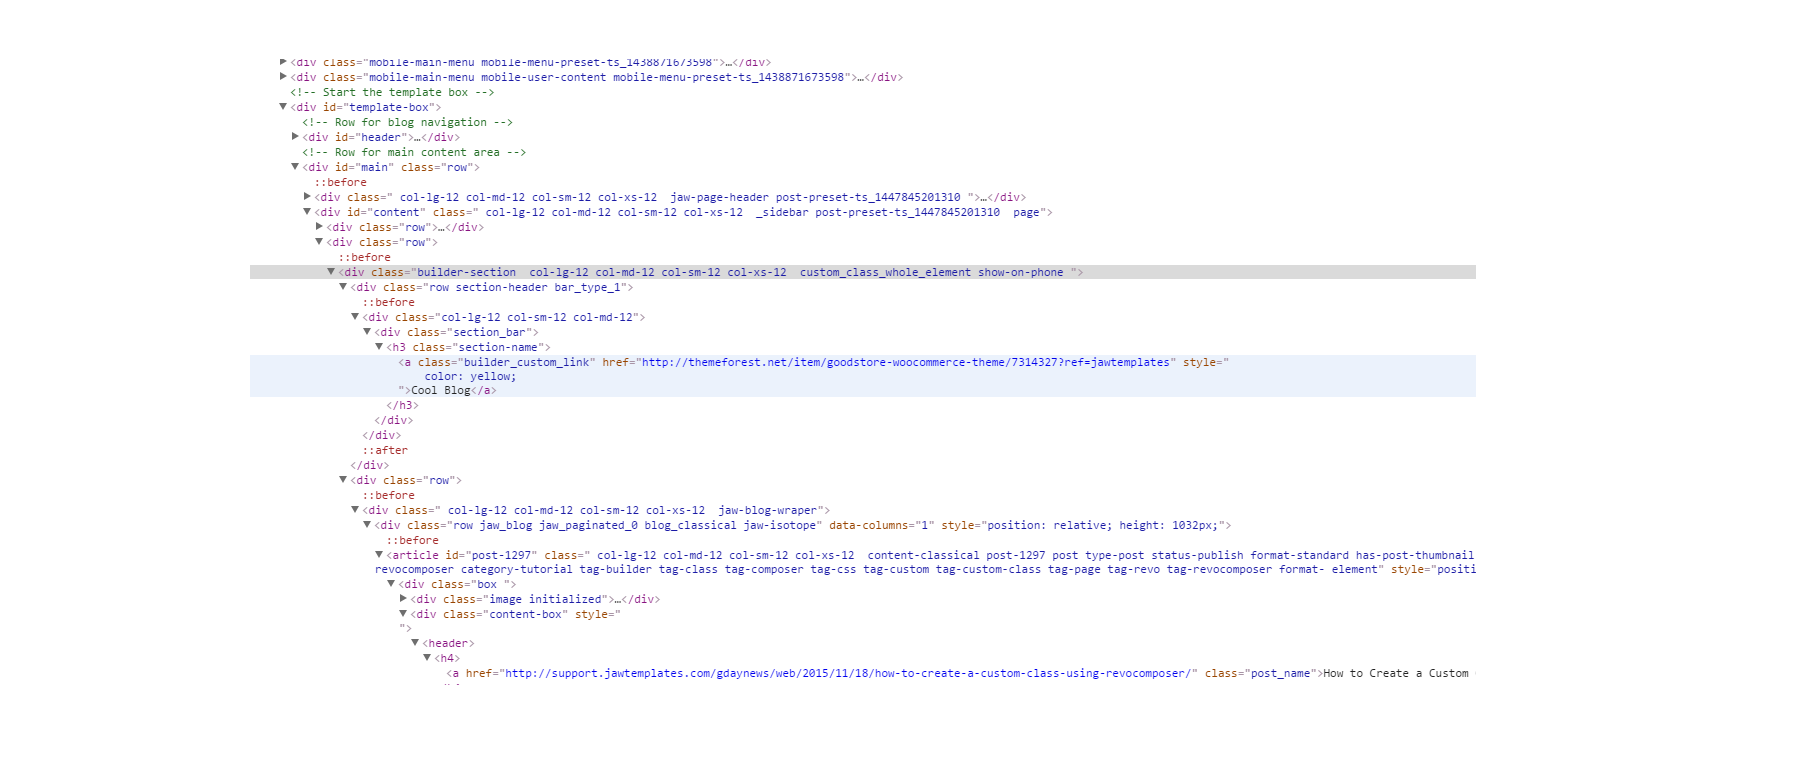
Here we can set lots of settings for each element in RevoComposer(each element’s setting is different due to its purpose). In this case, we want to just add some custom class and custom link. Firstly, we want to add custom class for the whole blog element, so please go to Design tab, scroll a little bit down and simply add this custom class. Say we name it custom_class_whole_element.
Also we want to add custom link for its title, reps. Bar. We add custom link for the Bar with the same way as for the Design. So click on Bar tab and simply add custom link. Let’s say we name it http://themeforest.net/item/goodstore-woocommerce-theme/7314327?ref=jawtemplates

Congratz, we made it together! Now, click Done and save the whole page. After you saved the page, view it and you can check the result.
Also we can check the code, if the custom stuff are really there 🙂
And now, we can simply style it by our selves without any issues. We also recommend adding custom stuff, e.g. custom css and custom js via our Theme Options. Please follow this tutorial for adding custom stuff.
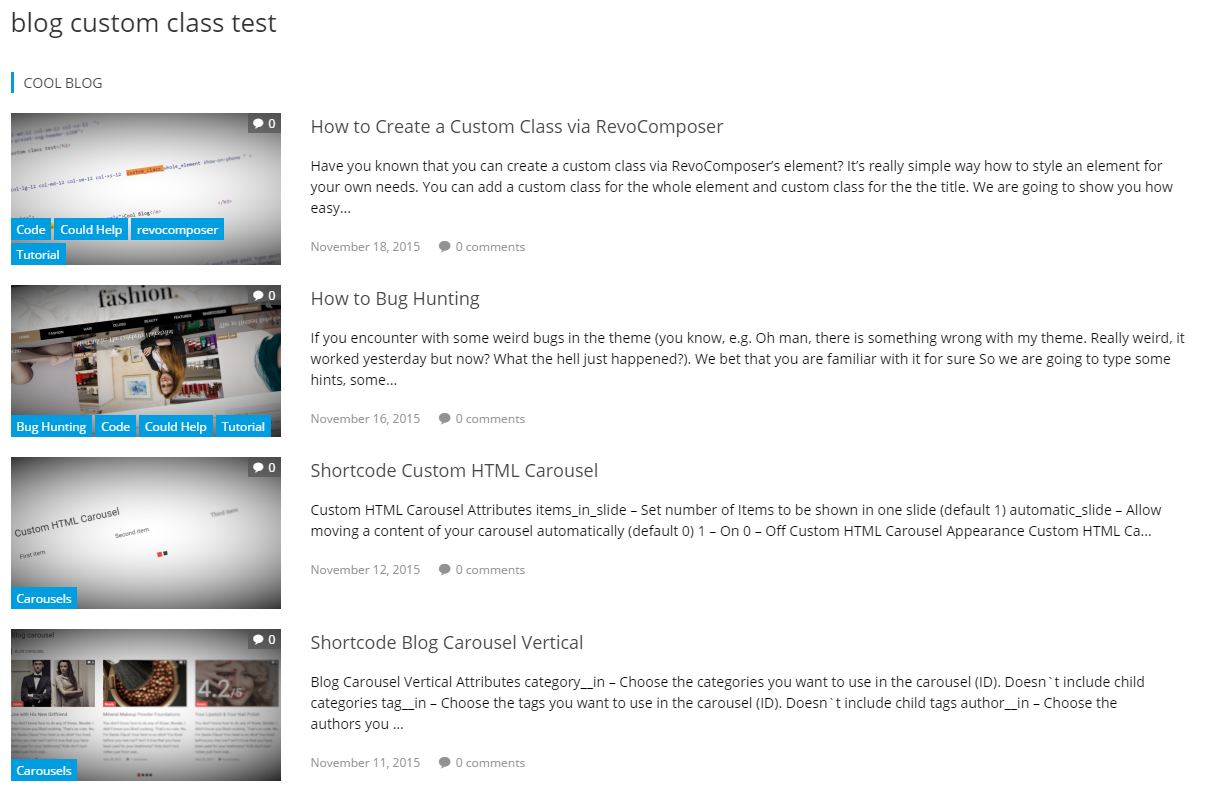
Our styled blog element
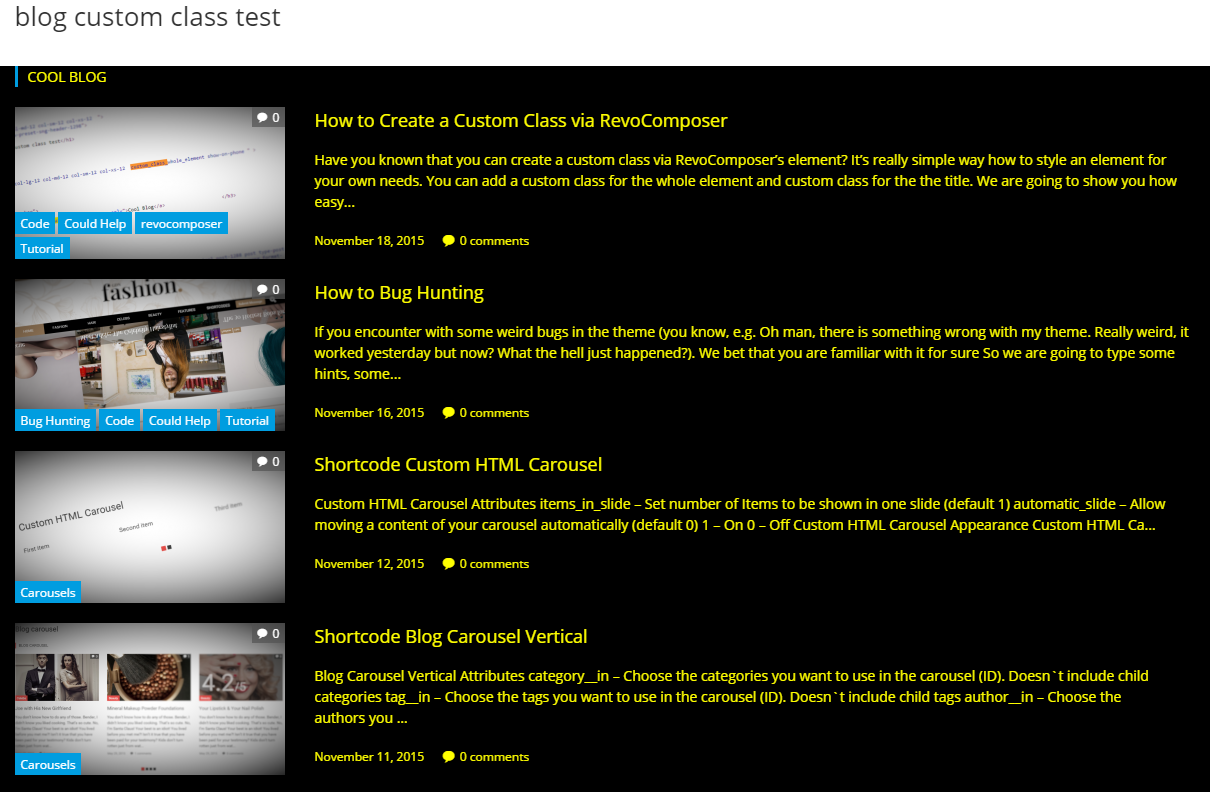
We added this code
.custom_class_whole_element { background-color: black; }.custom_class_whole_element h4 a,.custom_class_whole_element ul span, .custom_class_whole_element ul i, .custom_class_whole_element p { color: yellow!important; }


